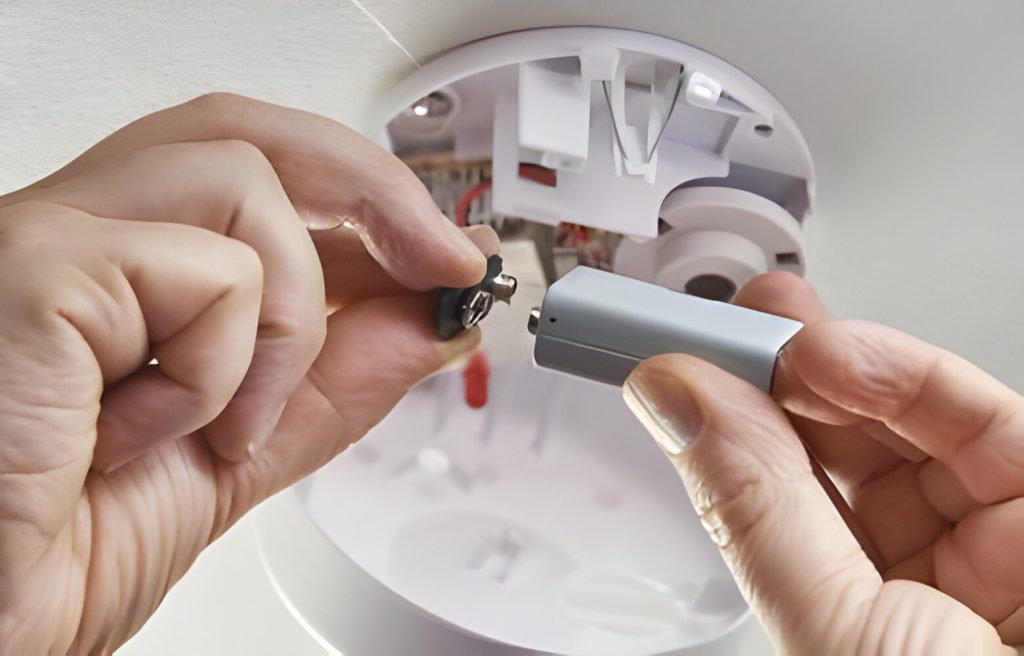
Replacing the battery in an ADT sensor requires a new battery and a screwdriver. Ensure the system is disarmed before attempting to replace the battery.
Home security is a crucial aspect of modern living, and maintaining your ADT sensors is essential for uninterrupted protection. Your ADT sensors are the eyes and ears of your security system; thus, keeping them powered with fresh batteries is vital to ensure they function correctly.
Regular maintenance, including battery replacement, can prevent false alarms and ensure your system is ready to alert you in case of an intrusion. Upkeep is straightforward and, with the right tools, can be done quickly and safely, keeping your home security system effective and reliable.

Adt Sensor Battery Replacement
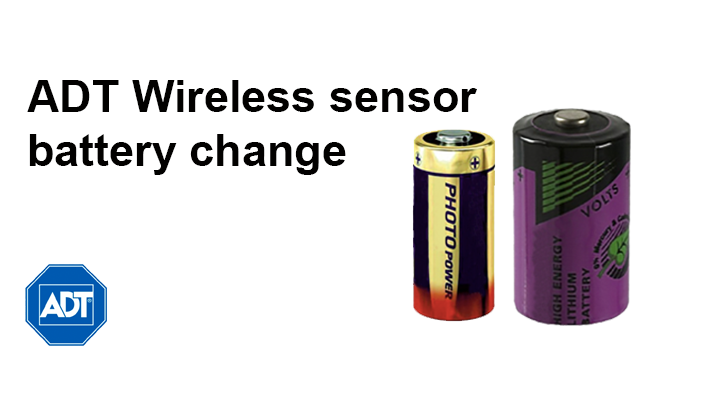
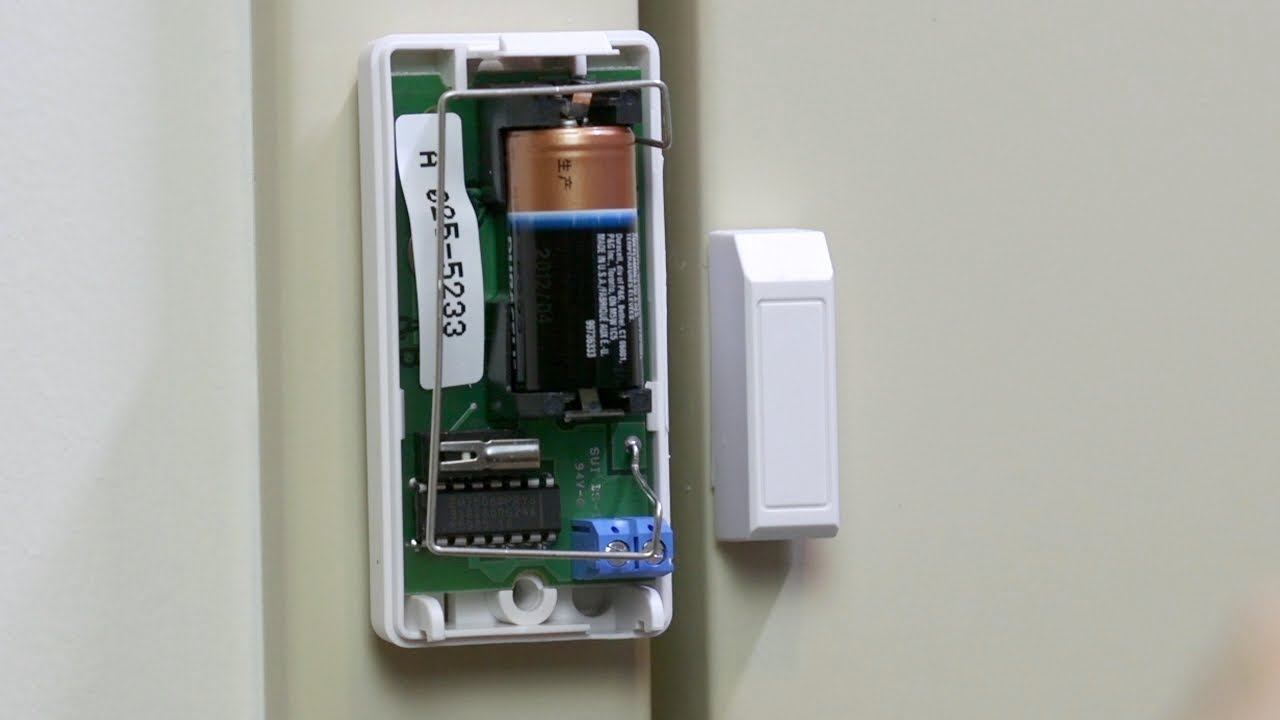
Replacing the battery in your ADT sensor is essential to keep your home security system functioning correctly. When you see a low battery alert, open the sensor using a small tool. Depending on your sensor model, you’ll usually find a CR123A or CR2032 battery inside. Remove the old battery, insert the new one with the correct orientation, and close the sensor casing. Check the sensor’s functionality through your control panel to ensure it’s working correctly. Regular battery checks ensure your system remains reliable and prevents false alarms.
Introduction To Adt Sensor Battery Maintenance
Keeping your home security system in top shape is crucial for ensuring safety. A key component of this is maintaining your ADT sensor batteries. These batteries are the lifeline of your sensors. They keep your system alert and ready to detect any potential threats. Regular battery checks and replacements can save you from unexpected security lapses.
Importance Of Regular Battery Replacement
Security systems rely on sensor functionality. Without power, sensors cannot transmit signals. This could leave your home vulnerable. Regular battery replacements prevent this risk. They ensure your sensors remain operational around the clock.
- Maximize sensor efficiency and responsiveness.
- Prevent false alarms that may occur due to low battery power
- Keep security system integrity intact to avoid system failures
Signs Your Sensor Battery Needs Changing
Be alert to the signs that indicate your sensor batteries need attention. This proactive approach keeps your ADT system reliable.
| Sign | What It Means |
|---|---|
| Flashing Lights | Battery power is low |
| Beeping Keypad | The battery needs immediate replacement |
| No Response | The sensor battery may be dead |
| Error Message | The system detects battery issue |
Replace batteries promptly to maintain continuous protection. Remember, a well-maintained security system is a reliable line of defense for your home.

Credit: www.smartsecurity.guide
Identifying Your Adt Sensor Model
Keeping your home secure is crucial, and a well-maintained ADT sensor system plays a big part. Understanding your specific ADT sensor model is the first step toward successful battery replacement. Different models may require distinct battery types. Let’s guide you through the process of identifying your sensor model.
Types Of Adt Sensors And Their Batteries
ADT offers a variety of sensors to fit different security needs. Each sensor type uses a specific battery. Standard ADT sensors include:
- Door and window sensors – often powered by CR123A or CR2032 batteries.
- Motion detectors – usually require AA or AAA batteries.
- Smoke detectors – typically use 3V lithium batteries.
- Glass break sensors – commonly use CR123A batteries.
Knowing the correct battery type is essential for your sensors’ smooth operation and longevity.
Finding The Sensor Model Information
To find your sensor model, check the device itself. Manufacturers often place model information on the back or side. Look for a label or engraving that lists the model number and battery type. If the sensor is hard to reach, refer to the user manual or your ADT account online. The model details are usually listed under each device’s specifications.
Tools And Materials Needed
Replacing the battery in your ADT sensor ensures your home remains secure. Before beginning, acquire the necessary equipment and supplies. This guide lists what you need for a smooth replacement process.
List Of Essential Tools
Begin with these tools:
- Screwdriver: To open the sensor case.
- Needle-nose pliers: These are used to remove the old battery.
- Non-conductive tweezers: To handle small parts.
- Soft cloth: To clean the sensor compartment.
Selecting The Right Battery Type
Choosing the correct battery is crucial. Follow these steps:
- Check your sensor’s manual for the battery model.
- Match the voltage and size with the old battery.
- Buy batteries from reputable brands for longer life.
Tip: Use batteries recommended by ADT to ensure compatibility.
Safety Precautions Before Starting
Before replacing the battery in your ADT sensor, prioritize safety. This guide outlines essential steps to ensure a safe replacement process.
Turning Off The System
Always turn off your ADT system before starting. This prevents any electrical issues or false alarms during the battery change.
- Locate the main control panel.
- Use the system’s keypad to power it down.
- Confirm the system is off by checking the display screen.
Handling Batteries Properly
Proper battery handling is crucial to avoid damage and ensure safety. Here are key points:
| Do | Don’t |
|---|---|
| Use gloves to handle batteries. | Touch battery contacts with bare hands. |
| Check battery type and size. | Use old or wrong type batteries. |
| Recycle old batteries properly. | Dispose of it in regular trash. |
Follow these steps to ensure a safe battery replacement in your ADT sensor.
Step-by-step Battery Replacement Process
Keeping your home secure means maintaining your alarm system. A crucial part of this is replacing batteries in sensors when needed. The process is straightforward, and you can do it yourself. Follow this step-by-step guide to change your ADT sensor batteries easily and quickly.
Accessing The Sensor Battery Compartment
First, locate your sensor on the door or window. Look for a small notch or tab on the sensor. This tab helps you open the compartment without damage.
- Press the tab gently with a screwdriver.
- Take off the cover to see the battery.
- Observe the battery type for replacement.
Removing The Old Battery
With the compartment open, you’ll see the old battery. Touch only the battery to avoid damaging the sensor.
- You may remove the battery using your fingertips.
- Dispose of the old battery properly.
Installing The New Battery
Get a new battery of the same type as the old one. Make sure the plus and minus signs match the compartment’s markings.
| Step | Action |
|---|---|
| 1 | Insert the new battery into the slot. |
| 2 | Press it down until it fits snugly. |
| 3 | Snap the lid back on and secure it. |
Test the sensor to ensure it’s working with the new battery. A functioning alarm system keeps your home safe.

Testing The Sensor Post-replacement
Replacing the battery in your ADT sensor is just the first step. Next, testing the sensor ensures it’s working correctly. This crucial stage helps maintain your home security system’s reliability. Let’s walk through how to verify your sensor’s functionality and address any issues that might arise post-replacement.
Ensuring Proper Functionality
After installing a new battery, test the sensor to confirm it’s operational. Follow these steps:
- Arm your system and wait for it to set.
- Open the door or window with the sensor.
- Check if the alarm triggers.
- Disarm the system and repeat the process a few times.
If the alarm sounds every time, your sensor passes the test. It’s ready to keep your home safe.
Troubleshooting Common Issues
Encountering problems after battery replacement is not uncommon. Here’s how to troubleshoot:
- Check the battery: Ensure it’s the correct type and installed correctly.
- Reset the sensor: Sometimes, a simple reset can fix the issue.
- Look for error messages: Your ADT panel may display specific error codes.
- Consult the manual: It often has a troubleshooting section.
- Contact support: ADT’s customer service can assist if all else fails.
You can quickly get your sensor back on track by methodically addressing these common snags.
Disposing Of Old Batteries
When your Adt Sensor battery needs replacing, think about safely disposing of the old one.
Environmentally Friendly Disposal Practices
Never throw old batteries in the trash. This can harm the environment, as batteries contain chemicals that can leak.
- Use clear tape to cover battery terminals. This prevents fires.
- Keep them in a cool, dry place until you can recycle them.
Where To Recycle Used Batteries
Find local recycling spots for your old batteries. It’s easy and helps the earth.
| Location Type | Details |
|---|---|
| Recycling Centers | Most cities have these. They take all battery types. |
| Retail Stores | Some stores accept batteries for recycling. |
| Special Events | Look for battery recycling events in your area. |
Check online tools to find the nearest drop-off location.

Credit: www.youtube.com
Maintenance Tips For Longer Battery Life
Keeping your ADT sensor batteries longer is critical to home security and peace of mind. Simple steps can extend battery life, saving time and money. Explore how regular checks and optimized settings play a crucial role.
Regular Sensor Checks
Regular monitoring of your ADT sensors ensures they’re always ready. Follow these easy steps:
- Check battery levels monthly.
- Look for warning signs like low battery alerts.
- Clean sensors to prevent dust buildup.
Use a schedule to remind yourself of these checks. This habit can prevent unexpected sensor downtime.
Optimizing Sensor Settings
Correct sensor settings can reduce unnecessary battery drain. Ensure optimal performance with these guidelines:
- Adjust sensitivity settings to avoid false alarms.
- Update firmware regularly for efficiency improvements.
- Turn off sensors in low-risk areas when not needed.
Smart settings adjustments lead to fewer battery replacements. Enjoy a secure, hassle-free home environment.

Credit: zionssecurity.com
Frequently Asked Questions
What Batteries Do Adt Sensors Use?
Depending on the model, ADT sensors typically use CR123A, CR2032, or CR2 lithium batteries. Always check your specific sensor’s manual for the correct type.
How Do I Change The Battery On My Adt Sensor?
To change the battery in your ADT sensor, first disarm your system. Then, open the sensor casing, replace the old battery with a new one, close the casing, and rearm your system.
Can I Replace My Adt Battery Myself?
Yes, you can replace your ADT battery yourself by following the user manual instructions and ensuring safety precautions are met.
How Do I Fix Low Battery On My Adt Alarm System?
Replace the low battery in your ADT alarm system with a new one, ensuring it matches the system’s specifications. Reset the alarm to clear the low battery indicator.
Conclusion
Replacing the battery in your ADT sensor ensures your home security system remains functional and reliable. Follow the steps outlined to avoid any disruptions in protection. Remember, regular maintenance keeps your security system at its best. Never be afraid to ask for expert assistance if you need it.
Stay safe and secure by keeping your equipment in top condition.

I am a battery specialist writer and blogger based in the USA & UK . I have been working with battery power energy for 3 long years and I give trips on low battery power problem and solutions . I have a lot of experience with battery power and I share them here.

